 |
|
|
| 1 2
3 4
5 |
| learning objectives
lesson outline tools,
games & materials examples
handout |
|

0/4 - Computer Skills: Digital Camera
1. Introduction (10 mins)
2. Viewfinder exercise (10 mins)
3. Taking real photos with the digital camera (1 hour)
4. Download photos into the computer (30 mins)
5. Conclusion and homework (10 mins)
|
|

Aim
 Students are
convinced that a photo can tell many stories Students are
convinced that a photo can tell many stories
How
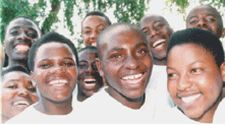
Briefly discuss the use of photos with the students. For example:
what does a photo tell you? (Use these photos or find others)

Show three pictures of people with different expressions.

Ask two students how they would describe the mood of these three people.
|
|

Viewfinder exercise (10 min)
Aim
 Students practise
looking through the viewfinder of a camera Students practise
looking through the viewfinder of a camera
How
Give the students a paper camera with a hole to practise looking through
a viewfinder; the image of a camera can be found in <See Tools>.
Looking through a viewfinder encourages students to isolate details
in their immediate surroundings, which prepares them for working with
a real camera. It also provides a better understanding of how you
see something through a camera, screen or monitor.
Students look through the viewfinder of the paper camera with a hole.
Look at other students, close up, the whole group at once, the landscape
through the window. Stand on a chair: what do you see? Sit on the
floor: what do you see? Students have to look for a nice spot where
they would like to take their actual photos.
|
|

Taking real photos with the digital camera (1 hour)
Aim
 Students are
able to take pictures with a digital camera Students are
able to take pictures with a digital camera
How
Students will learn to take photos in pairs. There are two cameras,
so they have to wait their turn. In the meantime, they can think about
the pictures you want to take.
Students have to pick a spot and take three photos of the fellow
student they paired up with.
For instance:
 a picture
of the total body, the model positioned in the middle a picture
of the total body, the model positioned in the middle
 a close-up a close-up
 student asks
the model to express the mood he/she wants to capture on the photo student asks
the model to express the mood he/she wants to capture on the photo

Show the waiting students the six tips from the handout to prepare
taking pictures.
|
|

Download photos into the computer (30 mins)
Aim
 Students are
able to download the photos to the computer, name them and store the
photos in the right folder Students are
able to download the photos to the computer, name them and store the
photos in the right folder
How

Help the students to upload the photos in the computer, using the
software. Get students to store their photos in a folder that 'belongs'
to the camera. When the photos are downloaded on the computer, students
can rename the pictures in explorer.
For instance:
 geoffrey_portrait.jpg geoffrey_portrait.jpg
 geoffrey_body.jpg geoffrey_body.jpg
 geoffrey_angry.jpg geoffrey_angry.jpg

After renaming the photos, students should put their photos into their
own folder.

Teach the students to insert their images into an MS Word-file. If
possible, show students how to add a speech-bubble to liven up their
photos.
|
|
Conclusion and homework (20 min)
Discuss with the students the issues covered in this lesson.
Two or three students can be asked to do the following in front of
the group:
 who can take
a photo of the whole group? (take 3 different ones) who can take
a photo of the whole group? (take 3 different ones)
 how do you
get the photos from the camera into the computer and into your personal
folder? how do you
get the photos from the camera into the computer and into your personal
folder?
 insert one
of the photos in MS Word. Can you add some text in a speech-bubble? insert one
of the photos in MS Word. Can you add some text in a speech-bubble?
Homework
Tell the students to read the handout before the nest lesson.
If you have extra time
 Try to experiment/practise
with MS Paint as a drawing tool to add text to pictures and change
or manipulate pictures Try to experiment/practise
with MS Paint as a drawing tool to add text to pictures and change
or manipulate pictures
 (you
can get to the MS Paint program through <start> <programmes>
<accessories> <PAINT>) (you
can get to the MS Paint program through <start> <programmes>
<accessories> <PAINT>)
 Practise inserting
pictures to an MS Word file and experiment with layout (adding text,
colours, etc.) Practise inserting
pictures to an MS Word file and experiment with layout (adding text,
colours, etc.)
|


